
You want a green lawn that stays perfect year-round without the water bills, mowing, or brown patches. Artificial turf can give you that, but a successful installation starts long before the first roll goes down.
This guide will walk you through how to plan your artificial turf installation project from start to finish. You’ll learn what to measure, what questions to ask, and how to prepare your yard so the work goes smoothly and the results last for years.
Measure Your Space and Define the Project Area
The first step in any artificial turf installation project is knowing exactly how much space you’re covering. Grab a tape measure and sketch a simple diagram of your yard.
Measure the length and width of each section where you plan to install turf. If your yard has curves, slopes, or irregular shapes, break it into smaller sections and measure each one. Don’t forget to measure around trees, planters, or other permanent features that will stay in place.
Write down your measurements and calculate the total square footage. This number will help you get accurate estimates and order the right amount of materials. Add about 5 to 10 percent extra to account for cuts and waste during installation.
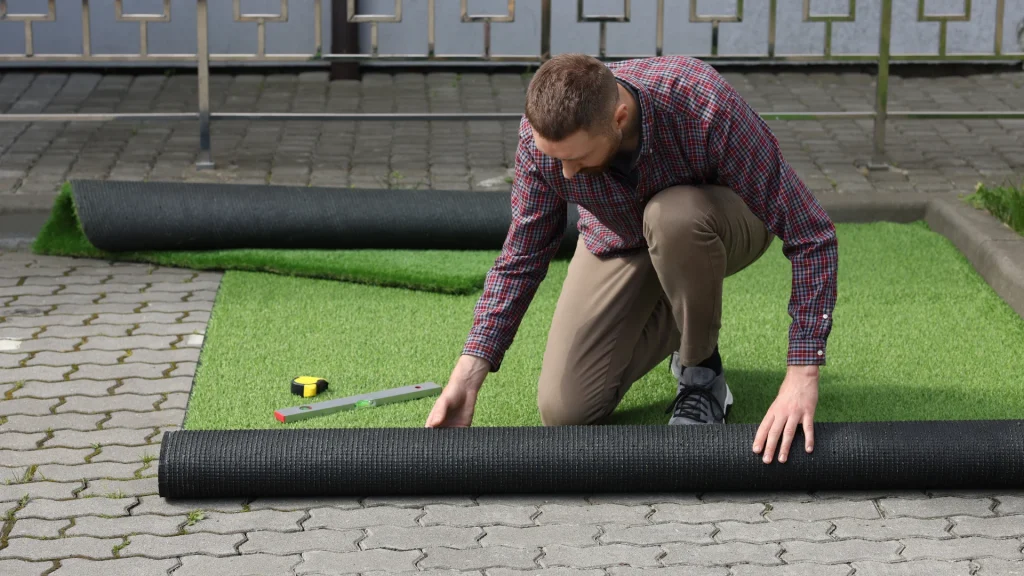
Choose the Right Type of Artificial Turf
Not all artificial turf is the same. The type you choose depends on how you’ll use the space and what look you prefer.
Turf comes in different pile heights, which is the length of the blades. Shorter pile (around 1 to 1.5 inches) works well for pathways and areas with heavy foot traffic. Taller pile (1.5 to 2 inches or more) looks more natural and feels softer, which is great for play areas or lawns where you’ll walk barefoot.
You’ll also see different blade shapes and colors. Some turf has a single green tone, while others blend multiple shades and include brown thatch for a more realistic look. Ask to see samples in natural light and feel them with your hands before you decide.
Consider drainage as well. Quality turf has perforations that let water drain through, which is important in areas that get rain or if you plan to rinse the surface. If you have pets, look for turf designed to handle urine and odor control.
Evaluate Your Existing Yard Conditions
Before you install new turf, you need to know what’s already there. Walk your yard and take notes on the current surface, drainage, and any problem areas.
If you have grass, it will need to be removed along with a few inches of soil to make room for the base. Existing concrete, pavers, or dirt will also affect how much prep work is needed. Look for any low spots where water pools after rain. These areas need extra attention during grading to prevent future drainage issues.
Check for sprinkler lines, utility cables, or tree roots that might be in the way. Mark their locations so you can work around them or plan to relocate irrigation if needed. If your yard has a slope, measure the grade. Artificial turf can be installed on slopes, but steep areas may require extra anchoring and careful base preparation.
Assess Drainage Needs
Good drainage is critical for any artificial turf installation project. Water needs somewhere to go, or you’ll end up with puddles and potential odor problems.
If your yard has clay soil or poor natural drainage, you may need to install a drain system under the turf. Talk to your installer about options like French drains or perforated pipes that can channel water away from the turf area. Proper grading during site prep will also help water flow off the surface instead of pooling.
Plan for Site Preparation and Base Work
The base under your turf is what keeps it smooth, stable, and draining properly. This step takes the most time and effort, but it’s the foundation of a long-lasting installation.
Site prep typically includes removing the existing surface, grading the soil to the right slope, and compacting a layer of crushed rock or decomposed granite. The base should be at least 3 to 4 inches deep and perfectly level or graded for drainage.
If you’re doing the work yourself, rent a plate compactor to pack the base material tight. Loose base will settle over time and cause dips or wrinkles in the turf. If tree roots or large rocks are in the way, remove them now before the base goes in.
Edge restraints are also installed during this phase. These are usually plastic or metal strips that hold the turf in place along borders, walkways, or planting beds. Secure edges prevent the turf from shifting or curling over time.
Decide Whether to DIY or Hire a Professional
Some homeowners choose to install artificial turf themselves to save money. Others prefer to hire a professional crew for speed, quality, and peace of mind.
DIY installation is possible if you have the time, tools, and physical ability to do heavy site work. You’ll need a sod cutter or shovel, a plate compactor, a utility knife, seaming tape and adhesive, infill material, and a power broom or stiff rake. Expect the project to take several days, especially if you’re learning as you go.
Hiring a professional crew like La Sierra Quality Landscape Inc. means the job gets done faster and with the right equipment. Our team handles site prep, base installation, and turf placement with care, so you get a smooth, durable result that lasts. We also manage grading and soil preparation to ensure proper drainage from the start.
If your yard has slopes, drainage challenges, or you want a flawless finish, professional installation is usually the better choice. You’ll also avoid the cost of renting or buying specialized tools.
Budget for the Full Cost of the Project
The total cost of your artificial turf installation project depends on several factors. Turf quality, yard size, site conditions, and whether you hire help all play a role.
Materials include the turf itself, base rock, edge restraints, seaming tape, adhesive, and infill (the sand or rubber material that helps the turf stand up and drain). If you need to remove old sod or concrete, add that to your budget as well.
Labor costs vary depending on the complexity of the job. Simple, flat yards are easier and faster to prep than sloped or heavily landscaped areas. Extra features like drainage installation or edging around planters will add to the total.
Don’t forget ongoing costs. Artificial turf is low maintenance, but you’ll still need to rinse it occasionally, brush the fibers, and top off infill every few years. These costs are minimal compared to watering and mowing natural grass.
Schedule the Work at the Right Time
Timing can make your artificial turf installation project easier and more successful. In the San Martin area, fall and spring are ideal because temperatures are mild and rain is less frequent.
Avoid scheduling installation during heavy rain or when the ground is soaked. Wet soil is harder to grade and compact, and it can delay the work. Dry, stable ground makes for faster, cleaner prep and a better final result.
If you’re working with a contractor, book your project a few weeks in advance. Popular times fill up quickly, especially in the warmer months when outdoor projects are in high demand.
Prepare Your Yard Before Installation Day
A little prep work before the crew arrives will help the project go smoothly. Clear the area of furniture, planters, toys, and anything else that might be in the way.
Trim back any plants or shrubs near the turf area so there’s room to work. If you have an irrigation system, mark the locations of sprinkler heads and lines so they don’t get damaged during excavation.
Make sure there’s clear access to your yard for equipment and materials. Crews will need to bring in base rock, turf rolls, and tools, so open gates and move vehicles if needed. If your yard is only accessible through the house, plan for extra time and effort to carry materials through.
Frequently Asked Questions
How long does an artificial turf installation project take?
Most residential installations take one to three days, depending on the size of the area and the complexity of the site prep. Larger yards or projects with drainage work may take longer.
Can artificial turf be installed over concrete or pavers?
Yes, turf can be installed over a solid surface as long as it’s level and has proper drainage. You’ll need a thin foam pad under the turf for cushioning, and you may need to add drainage channels if water can’t flow through the base.
How do I maintain artificial turf after installation?
Rinse the turf occasionally to remove dust and debris, especially if you have pets. Brush the fibers with a stiff broom to keep them standing upright, and remove leaves or sticks as needed. Infill may need to be topped off every few years to maintain the turf’s appearance and performance.
Ready to Start Your Artificial Turf Installation Project?
Planning your artificial turf installation project step by step sets you up for a beautiful, low-maintenance yard that you’ll enjoy for years. From measuring your space to choosing the right turf and preparing the site, every detail matters.
La Sierra Quality Landscape Inc. provides expert artificial turf installation in San Martin and throughout the greater Silicon Valley area. Our team handles every phase with care, from site prep to final placement, so you get a durable, green lawn that stays perfect through every season.
Call us at 408-590-5600 or visit our contact page to request your free estimate. We’re ready to help you plan and complete your project the right way.